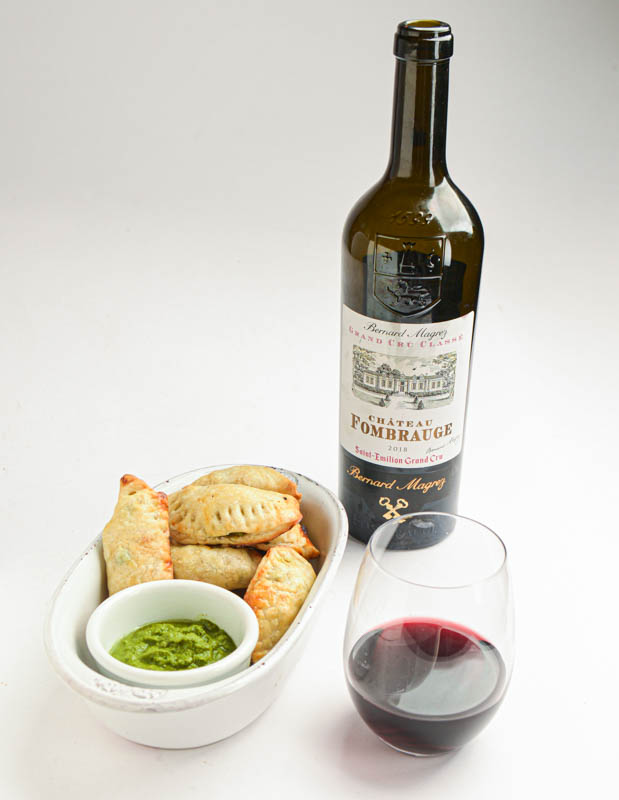
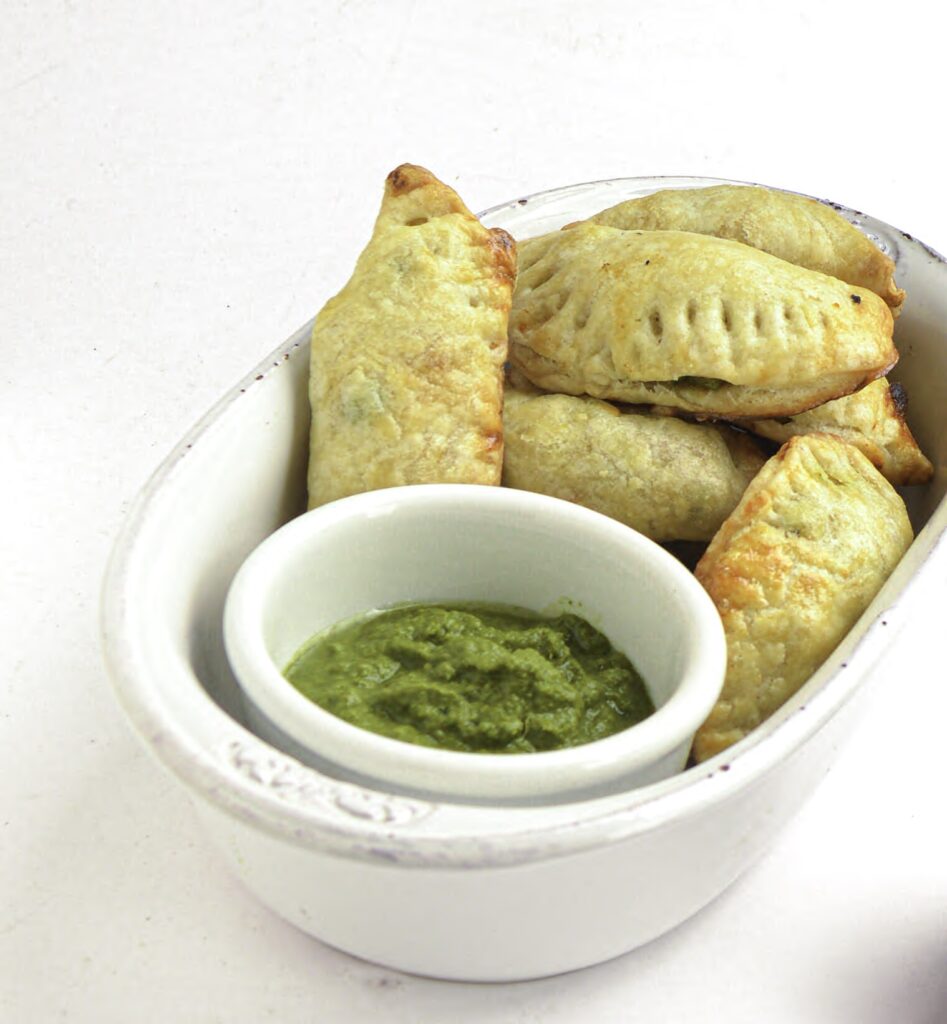
I’ve eaten samosas all over the world.
In my experience, the best ones were in Hyderabad, India, and in Colombo, Sri Lanka, but there were close competitors served from a street food stand in Nairobi, Kenya, and at Udipi Palace, a small Indian restaurant in Artesia, California’s wonderful Little India. But, truth be told, I’ve savoured every. single. samosa. I’ve ever been served–usually dipped in a fiery hot green cilantro sauce.
History has it that the samosa originated in Central Asia, probably in Persia, and probably as a delicacy served in a Persian royal court stuffed with meats, spices and dried fruits. The pastries were first mentioned in literature by Persian poet Abul-Fazl Beyhaqi in the 11th Century. By the 16th Century, Persian poets and artists were singing the samosa’s praise and sharing recipes on the decorated pages of Persian miniature paintings. Here are two “how-to” pages describing how to make the delicacies. Everyone lined up in that painting looks pretty eager to serve the guy on the throne a samosa! You gotta believe there were a lot of “tastings” that led up to that moment.
As the great migrations that followed moved people across the world, the samosa moved with them and was adapted to the needs of travelers, traders and soldiers as a large portable pastry filled mostly with meat. In many of the places along those routes, the samosa took root as a part of the local cuisine and remains so today.
When the samosa reached India (where it is most associated today), it was quickly adapted to the varied cuisines of that vast land mass–sometimes as a court delicacy, sometimes as a cheap street food for the masses, often vegetarian to comply with religious and economic exigencies. In the process, the spicing of the dish was adapted to local tastes; cumin, coriander, peppers and myriad other popular trade route spices found their way into the preparation of the filling.
When the British occupied India, the samosa’s reach was further widened to Britain and other British holdings like the African colonies.
In modern times, the samosa’s reach and popularity has been further expanded by the vast Indian diaspora.
Want to know more? If you love a good samosa as I do, here is a great BBC piece on Indian samosas: here.
The samosa recipe in this Blue Cayenne post is adapted from the King Arthur Baking site. You can find KAB’s original recipe here. This samosa is baked in a flaky pastry rather than fried in the traditional manner. I’ve added cashews and raisins to the filling because…well…because why not. I served these as an hors d’oeuvre at a recent Friendsgiving party with some special friends and, trust me on this, there were no leftovers!
Samosa Pastries
Ingredients
- Pastry
- 2 1/2 C. all-purpose flour
- 1/2 t. salt
- 16 T. unsalted butter (cold)
- 1/4 to 1/2 C. ice water
- Filling
- 2 C. potatoes (cooked, drained, cooled overnight in the refrigerator, cubed)
- 2 T. butter
- 1 C. onion (diced)
- 2 garlic cloves (minced)
- 1 t. curry powder
- 1/4 to 1/2 t. cumin (to your taste)
- Handful of raisins
- Handful of roasted (chopped) cashews
- 1 C. peas (thawed from frozen)
- Salt and pepper to taste
- 1/2 t. Sriracha hot sauce (optional, to taste)
- 1 large egg beaten with 1 t. cold water (for brushing pastries)
Directions
- Step 1 Put salt and flour in a mixing bowl. Using your hands (my method) or a pastry blender, combine half the chilled butter with the flour mixture. Mix until you have a coarse mixture like granola.
- Step 2 Add the remaining butter to the butter/flour mixture. Work with your hands until the new butter is the size of peas, flattening the pieces slightly with your fingers until you have pieces of butter coated with flour.Sprinkle some of the ice water over the flour/butter mixture and work the mixture with your hands until the dough comes together. Knead for a few seconds.
- Step 3 Divide your dough into two pieces. Press the dough into disk shapes. Wrap in plastic wrap and chill the dough disks in your refrigerator for about 30 minutes or up to overnight.
- Step 4 Prepare the filling. Melt butter and sauté onions and garlic in the butter until the onions turn translucent. Watch the garlic carefully as you sauté the mixture, being sure the garlic doesn’t burn and give the mix a bitter taste.
- Step 5 Add curry powder and cumin to the onion mixture and sauté for about a minute.
- Step 6 Add the cubed potatoes (I boiled my potatoes in their skins, chilled them overnight in the refrigerator and cubed them just before preparing the filling.) and stir to coat the potatoes with the spice mixture. Continue cooking the potatoes for four or five more minutes. I was careful not to mash the potatoes in the process. I enjoy samosas with some chunky texture in the potatoes.
- Step 7 Add raisins,cashews and thawed peas.
- Step 8 Add salt and pepper to your taste. Add hot sauce if you are feeling adventuresome. Remove from heat and let the filling cool.
- Step 9 When you are ready to make your samosas, roll out the chilled pastry dough on a lightly-floured surface until the pastry is about 1/8 of an inch thick. Using a 3 inch round cookie cutter, cut the pastry dough into circles. Fill each circle with a generous teaspoon of filling, fold the pastry in half, press to seal, and then use a knife to press the edges of the pastry to seal the samosas.
- Step 10 You can freeze the prepared samosas at this point. (I did.) Or, you can bake them on a greased pastry tray, on a greased pastry tray covered in parchment or on a Silpat. (I used the Silpat.)
- Step 11 Brush the tops of the samosas with egg mixed with a little water. Bake for about 30 minutes at 400 degrees F. or, if you have frozen the pastries, arrange them on the baking tray and let them rest on the counter for about an hour before you bake them for 30 minutes.
- Step 12 I served my samosas with a green chutney sauce.
Green Chutney Recipe: Blend 1 large bunch cilantro, 1 clove garlic, 1 T. minced fresh ginger root, 1 minced hot green chili pepper, 1 T. peanuts, salt to taste, and 2 T. lemon juice together in your blender. If the mixture does not liquify, add a small amount of water until your have a liquid consistency. Store in the refrigerator. This chutney mellows as it is stored in the refrigerator.


