Recent Posts

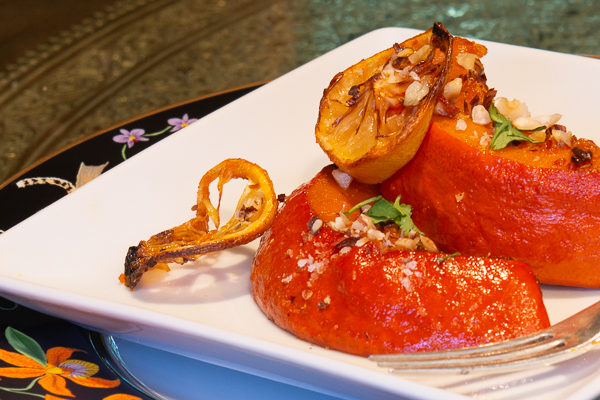
Spicy Kuri Squash With Harissa and Lemon

Spicy Kuri Squash With Harissa and Lemon

Cooks have long understood the impact of color on eating habits. The ancient Egyptians and Romans used herbs to color their foods and wines in an effort to enhance their appeal. Instinctively, I think, most of us understand that color suggests flavor, ripeness, and sweetness.…

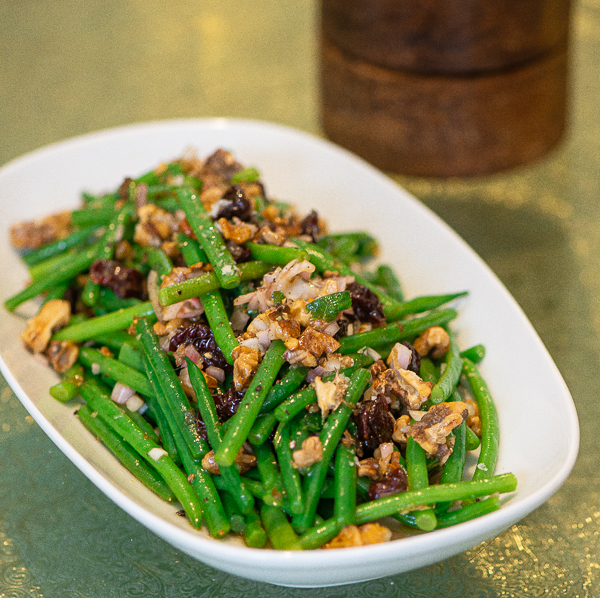
Not Your Momma’s (Or Dorcas’) Holiday Green Beans: Green Beans With  Dried-Cherry Vinaigrette

Not Your Momma’s (Or Dorcas’) Holiday Green Beans: Green Beans With Dried-Cherry Vinaigrette

According to Smithsonian Magazine somewhere in the neighborhood of 20,000,000 people will be eating green bean casserole this Thanksgiving, many of them following some version of the recipe Dorcas Reilly (pictured below) created in 1955. Dorcas was a food expert working for Campbell’s Soup Company…

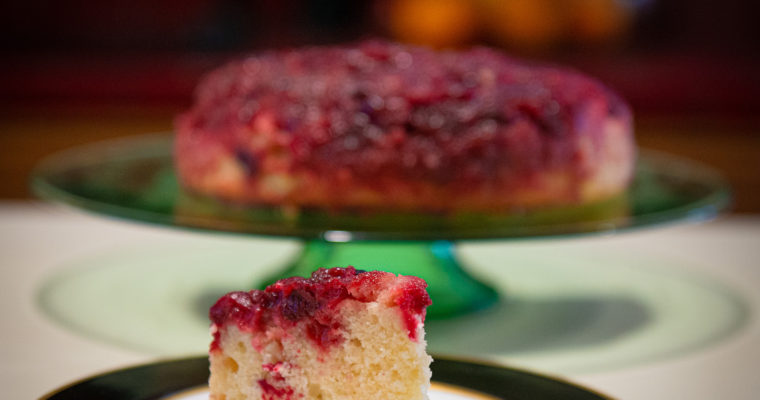
It’s A Beauty: Ricotta Cake With Raspberries

It’s A Beauty: Ricotta Cake With Raspberries

It’s all about the texture.

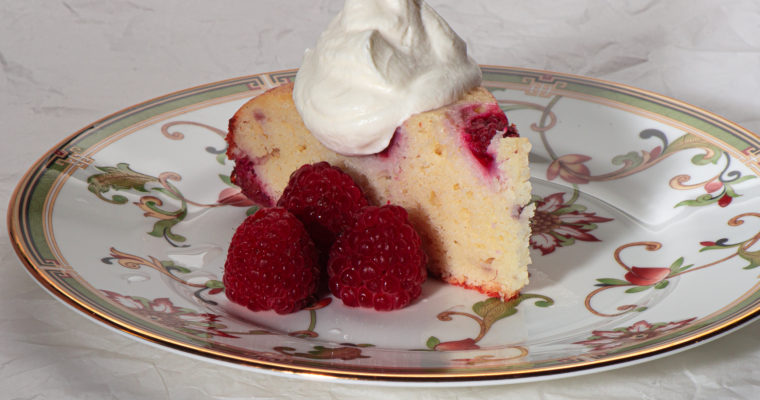
A generous dollop of ricotta cheese gives this delightful (and simple-to-make) vanilla cake an elegant fine crumb. Throw in some beautiful raspberries and this delicate cake becomes fragrant and even more delicious. Serve it with whipped cream or a scoop of high quality vanilla ice cream and you will have a memorable dessert–one that is special enough for a dinner party but also awfully good for breakfast.

Ricotta is a creamy curd–light and slightly sweet. Food historians trace its origins to Sicily where there is a long and gloried tradition of crafting ricotta-based desserts and pastas.

Here is an illustration showing the making of ricotta during the Middle Ages. Note the dog begging. I’m pretty sure that is Juliet in an earlier life.


Ricotta Cake With Raspberries

November 18, 2019
Ingredients
  • 1 1/2 C. all-purpose flour
  • 1 C. sugar
  • 2 t. baking powder
  • 3/4 t. kosher salt
  • 3 large eggs
  • 1 1/2 C. ricotta
  • 1/2 t. vanilla paste (or extract)
  • 1/2 C. unsalted butter (melted)
  • 1 C. frozen raspberries (divided)
  • Whipping cream for garnish
Directions
  • Step 1 Preheat oven to 350 degrees F. Prepare a springform pan by lining the bottom of the pan with parchment paper. Spray the parchment paper with a light coat of nonstick spray.
  • Step 2 Whisk dry ingredients (flour, sugar, baking powder and salt) together in a large bowl.
  • Step 3 In a separate bowl, whisk eggs, ricotta and vanilla together until you have a smooth mixture.
  • Step 4 Fold the ricotta/egg/vanilla mixture into the dry ingredients. Mix in melted butter. Gently stir in 3/4 C. of frozen raspberries trying not to break the berries. Put this batter into your parchment-lined pan. Distribute the remaining raspberries across the top of the batter.
  • Step 5 Bake cake for 50-60 minutes. When it is done the cake should be a golden brown and a skewer inserted in the middle of the cake should come out clean.
  • Step 6 Remove cake from oven and let it cool for at least 20 minutes.


This recipe is adapted from one that appeared here:  Bon Appetit’s Ricotta Cake With Raspberries.

Cheesy Potato Heaven! Gratin of Asparagus and Potatoes

Cheesy Potato Heaven! Gratin of Asparagus and Potatoes

When an Irish girl tells you that a potato dish soars, you should listen. This potato dish soars! Potatoes should definitely be on your Thanksgiving table anyway. The potato carbohydrates will give you the energy you need to keep things on a mellow Norman Rockwell-esque…

No Worries Here: Greek Fasolada (White Bean Soup)

No Worries Here: Greek Fasolada (White Bean Soup)

I’m imagining myself enjoying a bowl of this wonderful Fasolada soup on a lazy afternoon in a boisterous Greek taverna. Outside, the turquoise waters of the Aegean Sea lap gently against faded fishing boats beached on the sand . Bottles of Fix beer and a carafe…

Want Salt With That? Salted Chocolate Cookies

Want Salt With That? Salted Chocolate Cookies


I’m nibbling one of these wonderful Salted Chocolate Cookies as I type this post, smearing chocolate on my keyboard with wild abandon.

You are in for a treat.

These Salted Chocolate Cookies are sophisticated, ever-so-chocolaty and wonderful on a cool fall evening with a shot of brandy.

We all know that quality chocolate brings us pleasure and enhances our moods, but why (and how) does salt enhance the whole chocolate experience?

First, salt  intensifies the body’s ability to taste the sweetness of sugar. Salt triggers our taste buds to make them more receptive to sweet flavors and to suppress bitter tastes.

Secondly, salt adds texture to our foods. This is particularly true if a large-crystalled salt like Maldon or fleur de sel is used.

Finally, salt adds a layer of contrasting flavor to chocolate’s sweetness. Salt enhances the aroma of chocolates and other foods, too.

Food experts extol the affect of salt on foods. According to food expert Harold McGee in his acclaimed food reference book On Food and Cooking, salt “is the only natural source of one of our handful of basic tastes, and we therefore add it to most of our foods to fill our their flavor.” Samin Nosrat, the hot new cookbook author (Salt, Fat, Acid, Heat), devotes 38 pages of her bestselling book to a discussion of the effect of salt on foods.

History has borne out the importance of salting food, too. The flavor-enhancing properties of salt transform the taste of foods so significantly that governments have turned to salt as a revenue source, an act that has sometimes sparked rebellions. Remember that government salt monopolies and salt taxes led to revolution in France and inspired Ghandi’s salt march to Dandi.

Today, there are a number of salts available to cooks. Among the choices are granulated, iodized, flake, Kosher, unrefined sea salt, fleur de sel and flavored and colored salts. If you look for them, you can find some pretty fancy salt curators on line. Seasalt.com, for example, sells artisanal salt collections composed of salts collected around the world–even a “Snowflake Pacific Northwest Salt” with a texture similar, they advertise, “to freshly fallen snow.” Wow!

My favorite salt of the moment is Maldon. I once took a cooking class where the instructor mentioned that one of her chef friends carries an elegant little box of Maldon in her purse to use on her meals when she is away from home. That, of course, piqued my curiosity and I bought my first (of many) boxes of Maldon. It turns out that Maldon has been made in England since 1882. It is crunchy and wonderful. Here is a link to a very well-done video from the Maldon company: Maldon Salt.

Salted Chocolate Cookies

October 28, 2019
: 24 Cookies
Ingredients
  • 6 T. unsalted butter
  • 2 1/2 C. powdered sugar
  • 3/4 C. unsweetened cocoa powder (the best you can afford)
  • 1 t. kosher salt
  • 2 large egg whites
  • 1 large egg
  • 8 ounces chopped bittersweet chocolate (at least 67% cacao)
  • 1/2 C. finely chopped pecans
  • Flaky sea salt like Maldon
Directions
  • Step 1 Preheat your oven to 350 degrees F. and prepare two baking sheets by lining them with parchment paper.
  • Step 2 Melt butter in a small pan over medium high heat. Continue cooking the butter for 3 to 4 minutes until it is foamy and brown. (Watch the butter carefully during this stage. It is easy to burn. Stir the butter as it cooks to keep the solids from sticking to the bottom of the pan and burning.)Let the browned butter cool.
  • Step 3 Put the powdered sugar, cocoa powder and salt into a medium bowl and whisk it together. You want to get rid of the lumps in the sugar. I ended up pressing the sugar through a sieve.
  • Step 4 Add the egg whites, whole egg, and cooled browned butter to the sugar mixture, stirring the mixture until it is mostly smooth. Add the chocolate and pecans. Use a spatula for this step. It is easier to scrape the batter from the sides of your bowl.
  • Step 5 Use a spoon or a scoop to drop small quarter-size balls of the dough onto your baking sheet. You will want to space the dough balls about 2 inches apart because the cookies spread. Sprinkle some flaky salt over each ball. Bake cookies for six to eight minutes. They will still be tender at this point, so you will want to cool the cookies completely before trying to remove them from the baking sheet. I found that they were perfect several hours after baking.


This recipe is adapted from a NYTimes recipe that appears here.

‘Tis The Season : Maple Baked Beans

‘Tis The Season : Maple Baked Beans

  In this season of everything pumpkin and maple, what better treat than Maple Baked Beans? Maple syrup is, after all, good in just about everything and the contrast of sweet and savory flavors in baked beans never gets old. If you’ve been wondering about…

Frittering Away A Lazy Sunday Afternoon: Zucchini and Carrot Fritters

Frittering Away A Lazy Sunday Afternoon: Zucchini and Carrot Fritters

Gorengan. Tempura. Kuku. Bhaji. Beignet. Everybody makes fritters. Even Martha Washington. She made Ale and Apple Fritters– presumably for an appreciative George. A fritter, by definition, is simply a fried pastry. It can be either sweet or savory and can include fruit, vegetables, seafood or…

Woo-hoo! Blue Cayenne is Four.

Woo-hoo! Blue Cayenne is Four.

Cue the music.

Wild celebration here.

Juliet is salsa dancing down the hall and I’m wearing a silly party hat. This month marks Blue Cayenne’s fourth birthday.

Here we are writing our 315th blog post. Who knew?


Thank you for reading this blog and thank you to those of you who have given us words of encouragement. Particular thanks go to those who have served as recipe tasters for Blue Cayenne (Sarah and Gene, you know who you are!), to Marion Sutton who is Blue Cayenne’s biggest fan and promoter, and to Al Nomura, my patient and talented photography mentor. It turns out that it takes a village to sustain a food blog.

Here is a great celebratory cake: Brown Butter Cake With Bruised Pears And Walnuts. The brown butter flavor in this cake is definitely worthy of an important celebration. The cake is moist and almost puddingy (is that a word?). You will definitely want to try this one!

Brown Butter Cake With Bruised Pears and Walnuts

October 9, 2019
: 8 to 10
Ingredients
  • 1 1/4 C. walnuts
  • 2 1/4 sticks butter
  • 1 t. vanilla paste
  • 1 T. honey
  • 2 very ripe medium pears
  • 1/2 C. all-purpose flour
  • 2 1/2 t. salt
  • 6 egg whites (room temperature)
  • 1 C. granulated sugar
  • Whipped cream for garnish
Directions
  • Step 1 Preheat your oven to 350 degrees F. and prepare a springform pan by greasing it, lining it with parchment paper and then greasing the parchment.
  • Step 2 Toast walnuts. Cool walnuts to room temperature. Put the cooled walnuts into your food processor and process until the walnuts are finely ground and you are just beginning to see the walnuts turn slightly creamy. Set aside.
  • Step 3 Put vanilla and butter into a medium pan and heat over high heat until the butter is golden brown and very fragrant. You will need to stir the butter mixture constantly to be sure it doesn’t burn.   If you have a lot of dark sediment in your butter mixture (you will), strain it out. (It is, by the way, critical that you cool the butter mixture to room temperature. Failing to do that will result in deflating the meringue when you add the butter to the meringue.) Pour the brown butter into a large bowl, then stir in the wanuts and honey. Set the butter mixture aside to cool.
  • Step 4 Peel the pears. Core them and cut out and discard any really brown pieces of pear. Cut the pears into thin slices and set aside.
  • Step 5 Once your butter mixture has cooled (but before it has solidified), stir in the flour and salt. Set aside.
  • Step 6 Using a hand or countertop mixer and the whisk attachment, whip the room temperature egg whites at high speed until they turn opaque. Slowly add the sugar to the egg whites and continue whisking until the egg whites are shiny and thick.
  • Step 7 Next, fold the cooled brown butter mixture into the egg white mixture. Do this in three batches being careful not to deflate the egg whites.
  • Step 8 Pour batter into prepared springform pan. Cover the batter with the sliced pears. Bake for 45 minutes to one hour. (My cake took an hour.) You want the top of the cake to be a golden brown and you want a cake tester or toothpick to come out clean when stuck into the middle of the cake.


This recipe was adapted from one that appears on the James Beard Foundation site here.

The Best Things In Life Are…Well …Simple: James Beard’s Macaroni and Cheese

The Best Things In Life Are…Well …Simple: James Beard’s Macaroni and Cheese

  “Our life is frittered away by detail… simplify, simplify.” Henry David Thoreau     This very simple James Beard recipe for macaroni and cheese caught my eye on a day when I was craving the quintessential American dish. Sometimes a simple recipe reminds us…