Tag: Blue Cayenne

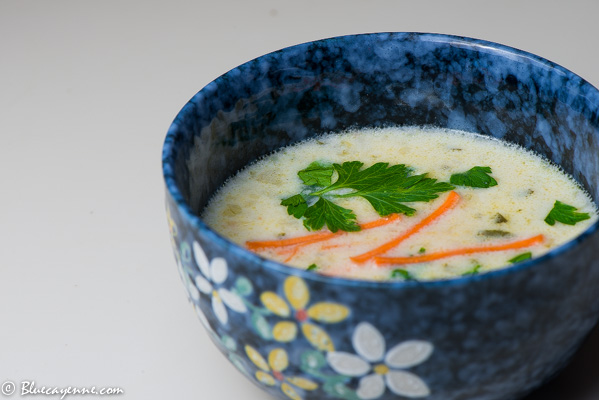
Cauliflower Soup

Cauliflower Soup

    According to what I read online, cauliflower was the “it” vegetable for 2014. Where was I? Don’t get me wrong. I love cauliflower. I just didn’t get the memo. No problem that I missed the big party, though. Cauliflower continues to be “hot” in…
Chocolate Mousse

  “Coraline opened the box of chocolates. The dog looked at them longingly. ‘Would you like one?’ she asked the little dog. ‘Yes, please,’ whispered the dog. ‘Only not toffee ones. They make me drool.’ ‘I thought chocolates weren’t very good for dogs,’ she said,…

Peach, Plum and Blueberry Cake and a Young Man with a Man Bun


Plum-Peach Cake

I was shopping in Sprouts recently and found myself following the wonderful scent of fresh nectarines wafting across the store when I ran into a young man with a man bun who was on the same mission.

“I could smell the nectarines from across the store,” I confessed a little sheepishly as we converged at the nectarine display.

“Me, too,” he said. “Isn’t it wonderful?”

My heart melted. How many people do you find in life who can recognize the scent of nectarines?

So, bags of nectarines in hand, we ran away for a lost weekend. (OK. I made that last part up.)

Life is good, though.

It is stone fruit season.

I can NEVER get my fill of cherries, nectarines, peaches or apricots. But, truth be told, my heart belongs to plums, particularly plums with deep red flesh. I think they are beautiful, too.

So, what is it with stone fruits? They appear in abundance at farmers markets this time of year and then, seemingly, disappear in the blink of an eye.  Here is their story.

Stone fruits are members of the rose family.

Fifteen species of stone fruits are native to the northern hemisphere but the “stars” of the stone fruit world originated mostly in Asia. The peach, for example, is believed to have reached the Mediterranean region from China (via Persia after which the peach gets its latin name–Prunus persica) around 300 BCE. Cherries originated in western Asia and southeast Europe. Apricots were imported into the Roman Empire from their native China.

Almonds are related to stone fruits, too. Domesticated by the Bronze Age, almonds are the seed of a drupe, a stone fruit closely related to the peach and the plum.

With modern hybridization techniques, there are many many types of stone fruits and lots of crosses. Most of us have heard of pluots (plums crossed with apricots), but the possibilities are endless. Have you, for instance, heard of apriums (apricots crossed with plums with the emphasis on the apricots), or peacotum (a peach, apricot and plum cross)? How about pluerry (a cross of cherries and plums)–that sounds really interesting.

Stone fruits are a good news bad news story. The good news is that they are rich in antioxidants, so they are good for you. The bad news is that their tissues break down and turn mealy in cold storage, making their season shorter than that of fruits like apples and pears. Also, because stone fruits do not store starch in their tissues and, therefore, don’t continue to ripen after harvest, they get softer but they don’t get sweeter. Bummer.

I’m not the only one to believe that stone fruits are one of Mother Nature’s true works of art. Artist and Syracuse University art professor Sam Van Aiken has produced grafted stone fruit trees as art projects. His trees can now be found in museums and personal art collections. For us Californians, one of his trees is planted at the Children’s Discovery Museum in San Jose.

Here is an artist’s rendering of what one of Van Aiken’s trees will look like at maturity. Those beautiful colors remind me of the delicate pink and lavender jades I admired in Southeast Asian jewelry stores. What could possibly be more lovely?

150727155350-tree-of-40-fruit-exlarge-169

Here is a link to a video about Van Aiken’s art projects. It is worth your time to watch. In a world that has seemingly gone mad, it is comforting to watch a gentle man pursuing beauty for no other reason than the enjoyment of the tree’s beauty and the connection it’s creation gives him to nature and conservation. (Van Aiken only uses heirloom, native and antique varieties of stone fruits in his grafts. When his trees fruit, people can sample varieties of fruit seldom available in markets.)

https://www.youtube.com/watch?v=ik3l4U_17bI

Like Van Aiken’s vision of “The Tree of 40 Fruits,” this stone fruit cake is a real stunner. It is red. It is orange. It is purple. It sits on your table and it glistens.

If you are one of those people who shuffles into the kitchen for a late night indulgence (you know who you are), what could better brighten the depths of any midnight than a generous slice of this cake? It wouldn’t hurt to keep a photo of the tree of 40 fruits on your refrigerator either. It is an ode to beauty.

The link to the original Gourmet Magazine recipe appears at the bottom of this post.

Recipe: Peach, Plum and Blueberry Cake

Pastry
1 1/2 C. all-purpose flour
1/2 C. sugar
1 t. baking powder
1/4 t. salt
1 stick (1/2 C.) cold unsalted butter (cut into 1/2 inch cubes)
1 large egg
1 t. vanilla

Filling
1/2 C. sugar
2 T. all-purpose flour
1 T. quick-cooking tapioca
2 lbs. peaches or plums or a combination
1 C. blueberries
1 T. fresh lemon juice

Directions:

For Pastry
Using your food processor, pulse together flour, sugar, baking powder and salt until well combined. Add cold butter cubes and pulse until the flour mixture resembles coarse meal with some pea-sized lumps of butter in the mixture. Add egg and vanilla and pulse until the dough clumps and begins to form a ball.

Press the dough onto the bottom and evenly as far as you can way up the sides of a springform pan with floured fingertips. Chill pastry in the pan for about 10 minutes until it is firm.

Filling
Put your oven rack in the middle position in your oven. Preheat oven to 375 degrees F.

Grind 2 T. sugar with the flour and the tapioca in a heavy-duty blender or food processor. You want this mixture to be powdery. Transfer this mixture to a large bowl and stir in the remaining  6 T. sugar. Add the peaches (and/or plums), blueberries and lemon juice and gently toss the mixture to coat the fruit. Spoon the filling into the chilled pastry and bake (loosely covered with a sheet of foil) until the filling is bubbling in the middle and the crust is golden. This should take approximately 1 and 3/4 hours.

Take cake from the oven and cool for 20 minutes on a rack. After 20 minutes, run a knife around the edge of the cake and remove the sides of the springform pan.

Let cake cool and serve either warm or at room temperature.

Cook’s Notes: This cake is at its most flavorful and beautiful on the first day after baking. The editors of Gourmet included a note with this cake recipe cautioning cooks that the cake can burn if cooked as directed in a dark pan rather than a light-colored metal pan because of the cake’s high sugar content. They recommended that those using a dark-colored pan should reduce the oven temperature by 25 degrees.

Here is the link to the original Gourmet Magazine recipe for this wonderful cake:

http://www.gourmet.com/recipes/2000s/2005/08/peachberrycake.html

Mushroom Potato Crema with Roasted Poblanos

  Today is my friend Norma’s birthday. You go, Norma! Norma is a talented gourd artist whose gourd dolls and masks have consistently won ribbons at the Orange County Fair. Her jewelry is exquisite, too. She is one creative lady! Norma also is an excellent cook.…

Food Myths

I ask you. What can you believe in if you can’t believe in the superior goodness of iron-rich spinach? This is an interesting piece from The Guardian about the influence lobbyists and the government have had in (mis)shaping our beliefs about nutrition. Makes you wonder…

¡Tamales!

Tamale 444Do you have a bucket list?

Mine is a culinary bucket list and my list is extensive. So… the good news for me is that I can’t, as they say, lay down my knife and fork for a very long time.

My list, as you might suspect, is pretty eclectic–the ultimate French onion soup, appams, a crisp thin crust pizza like the one Dixon and I enjoyed many many years ago in Corfu, a masterful Napoleon pastry, the perfect naan, divinity candy, sour-perfect rye bread and on and on. Mastering the art of tamale-making has long been very near the top of my list.

I’m not the first one to obsess about tamales. According to food historians, tamales are believed to have been an ancient food obsession, one that dates back to pre-Columbian times in Mesoamerica–maybe way back to 7000 B.C. As evidence, historians have found images of tamales represented in the art of indigenous people of that region thousands of years ago. Some historians believe that the tamale was a rock star in ancient cuisine because it was a healthy and highly-portable food for warriors, hunters and travelers and because the tamale assumed an importance in religious rituals as well.

Here, for example, is a detail incorporating tamales on a vase from the late classic Mayan period. If you ask me, I think the guy on the left is telling the guy on the right to stay away from his tamales. (“One more step…”)  On the other hand, the guy on the right could be an ancient bad-boy food critic delivering a withering criticism of the tamales–a Mayan “Nasty Bits” Anthony Bourdain. What do you think?

maya choco

Until recently, making a credible tamale has seemed out of the range of possibility for me.

Trust me. It is not like I hadn’t tried. had the corn husks. I had the enormous tamale steamer. While others binge-watched How I Met Your Mother, I binge-watched How to Make Tamales videos on You Tube–even several in Spanish which I couldn’t understand but I wanted to watch the technique.

Heaven knows, I had the will. ( My friend Sarah says I’m like a dog with a bone when I face a challenge. Maybe.)

But every time I tried to make tamales they were…ahem…mediocre.

Then I had a tamale breakthrough, an epiphany.

Sarah and I attended a tamale making class at The Sur La Table Cooking School in Costa Mesa. Ours was a very good experience and our teacher, Alex Morales, was excellent. Alex assured us that we could overcome our fear of tamale making.

After some procrastination, Sarah and I finally decided to put our tamale training into practice this week. We had a two-person tamalada, a tamale making party, in my kitchen.

We were rested. We were ready. We had TT- tamale ‘tude: Look out Huntington Beach! Two tamale divas were on the loose! (Make that three tamale divas. Juliet was very much an interested party in the whole process.)

Here is a photo of tamale diva Sarah and sweet tamale diva Juliet taken at the beginning of our tamalada.

tamale divas


And there it was.

¡Success!

Tamale Pot

This is a photo of Sarah’s tamales in the pot ready to steam. Are those tamales beautiful or what?

Can you do this? Definitely!

Here is our adaptation of the recipe we learned at the Sur La Table school. We divided our preparation over several days—making sauces one day, masa another and on and on.

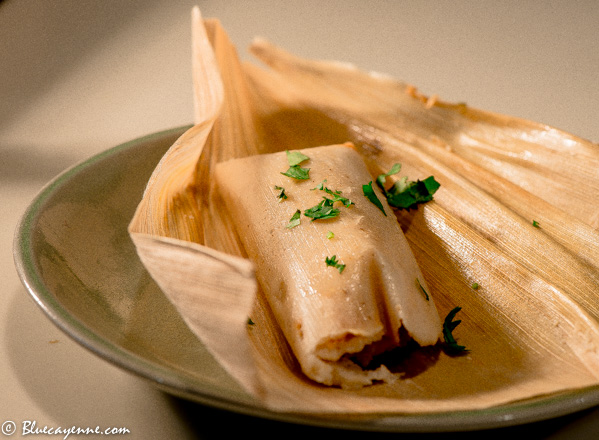
Sarah and I took home over twenty tamales each. Now the question is how to eat them all. I just ate one for for breakfast and it was wonderful. Here is a photo of my breakfast tamale.

One check down on my bucket list.

Tamale


Recipe: Tamales

Masa Preparation

6 C. masa harina

1  1/2 t. sea salt

3 t.  baking powder

1 C. vegetable shortening (at room temperature)

1 C. unsalted butter (at room temperature)

3 C. vegetable broth (plus more if needed)

Directions: 

Whip room temperature shortening and butter in your mixer at a high speed for approximately two minutes until it is fluffy. Set aside. (Traditionally, tamales were made with lard. We found that the vegetable shortening and butter combination was a fine substitute for the lard.)

Measure masa harina, salt and baking powder into a large bowl. Whisk to be sure the salt and baking power are well mixed into the masa harina.

Add the masa harina mixture to the beaten shortening one cup at a time, alternating with broth. Your mixer should be set on medium (or slower) speed when you do this to avoid splattering your kitchen with bits of masa.  When you have mixed all the masa harina mixture and all of the broth into the fats, increase the mixer speed to medium high and continue to whip the mixture until it resembles the consistency of a soft but workable dough. This will take about 3 minutes. If your dough is too dry, you can add more broth (1/4 C. at a time) until you get the right consistency. (We didn’t need to add any extra broth.)

The traditional test for the readiness of your masa is to drop a ball of the dough into a glass of cold water. If the masa ball floats, your masa is ready. If your masa doesn’t float in the glass of water, you will need to beat it more to get more air into the mixture.

Filling Recipe (Your choice of ingredients. Here are some suggestions.)

Grated cheddar cheese

Grated Monterey jack cheese

Grated Cotija Cheese

Strips of Meunster Cheese

Strips of Oaxaca Cheese

Roasted chiles (peeled and deseeded)

Roasted red peppers

Directions: 

Above are suggestions for the filling. For the most part, we used slices of chiles (both canned green chiles and oven-roasted and peeled poblano and Anaheim chiles), cheese and a spoonful of sauce as a filling for our chile cheese tamales.

Corn Husks (rinsed and soaked in hot water)

Rinse husks and cover in hot water for an hour. When you are ready to make your tamales, pat husks dry before spreading with masa.

Red Sauce Recipe

1 Quart water

12 dried guajillo chiles (stems and seeds removed)

4 T. vegetable oil (divided)

2 t. cumin seeds

1 t. coriander seeds

1 large yellow onion (peeled and coarsely chopped)

4 medium garlic cloves (peeled and smashed)

1 can (14 ounce) fire roasted tomatoes (drained)

1 C. low-sodium chicken or vegetable broth (plus more as needed)

1 T. firmly packed light brown sugar

1 C. canned pineapple chunks (drained)

Sea salt and freshly ground black pepper to taste.

Directions:

Heat water in a medium saucepan until boiling.  Stir prepared chiles into the boiling water. Take the pan off the heat and allow the chiles to soften in the hot water. This will take about 30 minutes. Drain and reserve 2 cups of the soaking water.

Heat 2 T. oil in a large heavy saucepan over medium heat.When the oil is hot, add cumin and coriander seeds and toast the seeds until they are fragrant for about one minute. Watch the pan carefully. You don’t want burned seeds. Put onions and garlic into the pan with the seeds and saute until the onion is softened. This will take about 5 minutes.

Put the onion-garlic-seed mixture into a blender along with the softened chiles. Puree until smooth, using the reserved chile water to thin the mixture.

On medium heat, add the remaining 2 T. oil to the saucepan. Add the chile mixture from the blender. Add tomatoes and enough stock to give the sauce a thick, pourable consistency. Add brown sugar and pineapple and salt and pepper to taste. Simmer this mixture for 6 to 8 minutes.

Put the mixture back in the blender and puree until the sauce is smooth. Alternatively, use an immersion blender in the pan.

Adjust seasonings and use the sauce in the filling for your tamales and over the cooked tamales when they are served.

Assembling the tamale:

Take a soaked corn husk out of the soaking water. Pat it dry and remove any corn silk that might be sticking to the husk. Lay the husk flat on your counter with the rough side down and wide end of the husk nearest to you. Spread about 1/3 cup of your prepared masa on the corn husk. You can use a spatula, your fingers, the back of a spoon or a masa spreader for this step. Top the masa with 2 or 3 tablespoons of filling. Fold the corn husk so that the two long sides of the husk are folded towards the middle. Once you have made that fold, fold the narrow end of the husk up over the filled section. You can use a bit of kitchen twine to tie your tamale packet together, although that is not necessary. (See the video link below for a good view of how this is done.)

Put your filled tamale packets in a steamer over about two inches of boiling water. Your pot should have a steamer insert (rack) that keeps the tamales above the water as they steam. The tamales should be loosely stacked in the steamer with the open ends of the tamales facing up (You don’t want the filling to run out of the tamale as you steam it!). Steam for an hour, checking occasionally to be sure that you still have water in our steamer. If you don’t, add water. After an hour, take a tamale out of the steamer and check it for doneness. If the tamale is done the masa will pull away from the sides of the husk. If your tamale is not done, return it to the steamer with the other tamales and continue steaming until the masa does pull away from the sides (about 30 minutes more, usually).

Here is a video link I like. I enjoyed this lady’s enthusiasm for her tamales and she does a good job of showing you how to assemble and fold them.

Cherry Upside-Down Cake, Immortality and Sarah’s Birthday

According to Chinese mythology,  Goddess Xi Wang Mu grew immortality fruits in her garden. Most sources say they were peaches. Some say they were cherries. (Both are stone fruits.) Whatever immortality fruit it was, there was one very big problem. The fruits ripened every thousand…